
「RPGを作りたいけど、どんなシステムを実装すればいいか分からない」
限られた時間でRPG制作を進めたい人にとって、RPG作例を参考にすることは重要です。
Unityで実装できるRPGシステムの具体例を、技術的に正確に整理します。バトルシステム、レベルアップ、アイテム管理など、実際に動くコードとともにまとめます。
\あなたにピッタリのRPG制作講座を見つけよう!/
おすすめ第1位
Unity ノンフィールドRPG
+スレスパ風JRPG講座
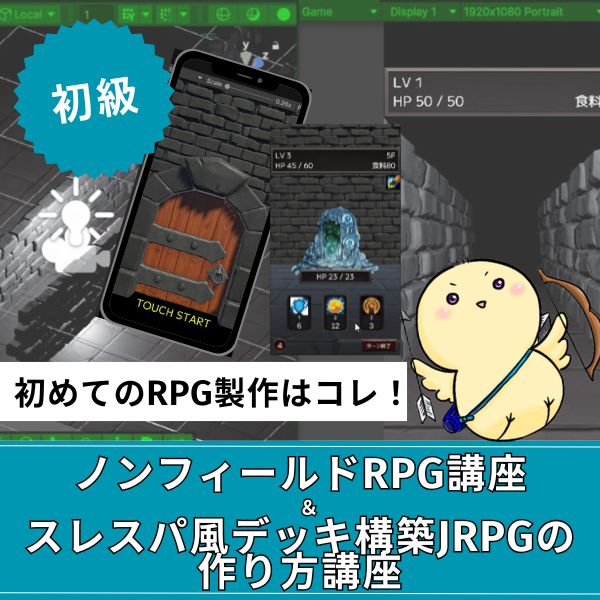
初心者向け・Unity6対応・スマホ化対応の三拍子。入門者が最初に学ぶ1本として最も最適。トレンドのデッキ構築型システムを最速で実装できます。
超本格派・最高峰
Unity 世界樹の迷宮風
3DダンジョンRPG講座
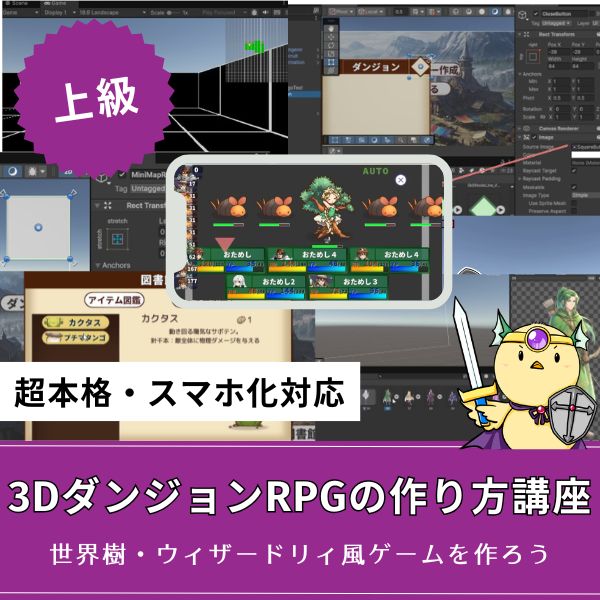
ウィザードリィ・世界樹風の超本格派3DダンジョンRPGをゼロから開発。オートマッピング・キャラメイク・スキルツリー・カウントタイムバトルまで完全実装。
大ボリューム本格派
Unity 2DRPGの作り方講座
(ドラクエ風)

王道かつ本格的な2DコマンドバトルRPGを作りたいならこれ。全27回という圧倒的なボリュームで、基礎から実践的なマップ・戦闘構築まで徹底解説。
あなたのオリジナルゲーム、今年こそ完成させませんか?
RPG・アクション・ホラー…Unityで本格ゲームを作りたい人のための学習サイトです。
実際に完成するゲームを題材に、
ソースコード・素材・プロジェクト一式をすべて公開。
仕事や学校の合間の1〜2時間でも、
「写経→改造」で自分のゲームまで作りきれる環境です。
Unityで実装できるRPGシステム一覧

Unityで実装できるRPGシステムの一覧です。
ここでは、RPG制作で必要になる主要な機能をカテゴリごとに整理しています。
どのシステムを作ればRPGとして成立するのか、全体像をひと目で把握できます。
基本システム
RPG制作の土台となる、キャラクター操作やアニメーションなどの基礎的な仕組み。
- キャラクター移動システム
- キーボード/タッチ入力での移動
- アニメーション制御
- バトルシステム
- ターン制バトル
- リアルタイムバトル
- スキルシステム
- レベルアップシステム
- 経験値管理
- ステータス成長
- スキル習得
- アイテム・インベントリシステム
- アイテムの取得・使用
- インベントリ管理
- 装備システム
応用システム
クエストや報酬など、ゲームの目的・進行を作り出す応用的な仕組み。
- クエストシステム
- クエストの受注・達成
- 報酬の付与
- 会話システム
- NPCとの会話
- 選択肢による分岐
- セーブ・ロードシステム
- ゲーム状態の保存
- データの読み込み
RPGシステム設計の基礎を理解しよう

RPGシステムを実装する前に、以下のシステム設計の基礎を理解しておく必要があります。
データとロジックの分離
RPGシステムを実装する際、まず理解しておきたいのが「データとロジックをどう整理するか」という点です。
システム設計の基本を確認しておきましょう。
RPGシステムでは、データ(ステータス、アイテム情報など)とロジック(バトル処理、レベルアップ処理など)を分離します。
これにより、データの変更が容易になり、コードの保守性が向上します。
ScriptableObjectを使ったデータ定義:
|
1 2 3 4 5 6 7 8 9 10 11 12 |
using UnityEngine; [CreateAssetMenu(fileName = "New Character", menuName = "RPG/Character")] public class CharacterData : ScriptableObject { public string characterName; public int maxHP; public int maxMP; public int attack; public int defense; public int speed; } |
シングルトンパターンの使用
ゲーム全体で1つだけ存在するマネージャークラスを実装する際、どのように設計すればいいか迷いやすいポイントがあります。
ここでは、シングルトンパターンの使い方を整理しておきます。
ゲーム全体で1つだけ存在するマネージャークラスには、シングルトンパターンを使います。
これにより、どこからでもアクセスできるマネージャーを実装できます。
|
1 2 3 4 5 6 7 8 9 10 11 12 13 14 15 16 17 18 19 20 21 22 23 24 25 26 27 28 29 30 31 32 33 34 35 36 |
using UnityEngine; public class GameManager : MonoBehaviour { private static GameManager instance; public static GameManager Instance { get { if (instance == null) { instance = FindObjectOfType<GameManager>(); if (instance == null) { GameObject go = new GameObject("GameManager"); instance = go.AddComponent<GameManager>(); } } return instance; } } void Awake() { if (instance == null) { instance = this; DontDestroyOnLoad(gameObject); } else { Destroy(gameObject); } } } |
RPGシステムを実装する4つのステップ

RPGシステムの実装例を、ステップ形式で説明します。
RPGを作る際、まずつまずきやすいのが「どんなシステムを実装すればゲームとして成立するのか」という全体像の把握です。
そこで、Unityで実装できる主要なRPGシステムを大分類で整理しました。
これを見ることで、作るべき機能・優先順位・開発の進め方がひと目で分かるようになります。
ステップ1:バトルシステムの実装例
ターン制バトルの実装:
|
1 2 3 4 5 6 7 8 9 10 11 12 13 14 15 16 17 18 19 20 21 22 23 24 25 26 27 28 29 30 31 32 33 34 35 36 37 38 39 40 41 42 43 44 45 46 47 48 49 50 51 52 53 54 55 56 57 58 59 60 61 62 63 64 65 66 67 68 69 70 71 72 73 74 75 76 77 78 79 80 81 82 83 84 85 86 87 88 89 90 91 92 93 94 95 96 97 98 99 100 101 102 103 104 105 |
using UnityEngine; using System.Collections.Generic; public class TurnBasedBattle : MonoBehaviour { [System.Serializable] public class BattleUnit { public string unitName; public int currentHP; public int maxHP; public int attack; public int defense; public int speed; public bool isPlayer; } [SerializeField] private List<BattleUnit> battleUnits = new List<BattleUnit>(); private int currentTurnIndex = 0; void Start() { // 速度順にソート battleUnits.Sort((a, b) => b.speed.CompareTo(a.speed)); StartBattle(); } void StartBattle() { Debug.Log("Battle Start!"); NextTurn(); } void NextTurn() { if (currentTurnIndex >= battleUnits.Count) { currentTurnIndex = 0; } BattleUnit currentUnit = battleUnits[currentTurnIndex]; Debug.Log($"{currentUnit.unitName}'s turn"); if (currentUnit.isPlayer) { // プレイヤーのターン(UIでコマンド選択) PlayerTurn(currentUnit); } else { // 敵のターン(AIで行動決定) EnemyTurn(currentUnit); } } void PlayerTurn(BattleUnit unit) { // UIでコマンド選択を待つ // ここでは例として攻撃を実行 Attack(unit, battleUnits.Find(u => !u.isPlayer)); } void EnemyTurn(BattleUnit unit) { // 敵は自動で攻撃 Attack(unit, battleUnits.Find(u => u.isPlayer)); } void Attack(BattleUnit attacker, BattleUnit target) { int damage = Mathf.Max(1, attacker.attack - target.defense); target.currentHP -= damage; Debug.Log($"{attacker.unitName} attacks {target.unitName} for {damage} damage!"); if (target.currentHP <= 0) { target.currentHP = 0; Debug.Log($"{target.unitName} is defeated!"); if (target.isPlayer) { GameOver(); } else { Victory(); } } else { currentTurnIndex++; NextTurn(); } } void GameOver() { Debug.Log("Game Over..."); } void Victory() { Debug.Log("Victory!"); } } |
作業時間: バトルシステム実装で2〜3時間
ステップ2:レベルアップシステムの実装例
経験値・レベルアップシステム:
|
1 2 3 4 5 6 7 8 9 10 11 12 13 14 15 16 17 18 19 20 21 22 23 24 25 26 27 28 29 30 31 32 33 34 35 36 37 38 39 40 41 42 43 44 45 46 47 48 49 50 51 52 53 54 55 56 57 58 59 60 61 62 63 |
using UnityEngine; [System.Serializable] public class PlayerStatus { public int level = 1; public int exp = 0; public int maxHP = 100; public int currentHP = 100; public int maxMP = 50; public int currentMP = 50; public int attack = 10; public int defense = 5; public int speed = 10; public void AddExp(int amount) { exp += amount; Debug.Log($"Gained {amount} EXP! Total: {exp}"); while (exp >= GetExpToNext()) { LevelUp(); } } void LevelUp() { exp -= GetExpToNext(); level++; // ステータス成長 int hpGrowth = 20; int mpGrowth = 10; int attackGrowth = 5; int defenseGrowth = 2; int speedGrowth = 1; maxHP += hpGrowth; currentHP = maxHP; // HP全回復 maxMP += mpGrowth; currentMP = maxMP; // MP全回復 attack += attackGrowth; defense += defenseGrowth; speed += speedGrowth; Debug.Log($"Level Up! Now Level {level}"); Debug.Log($"HP: {maxHP} (+{hpGrowth}), MP: {maxMP} (+{mpGrowth})"); Debug.Log($"Attack: {attack} (+{attackGrowth}), Defense: {defense} (+{defenseGrowth})"); } int GetExpToNext() { // レベルに応じた必要経験値 return level * 100; } public float GetExpProgress() { if (level >= 100) return 1f; // 最大レベル return (float)exp / GetExpToNext(); } } |
作業時間: レベルアップシステム実装で1〜2時間
ステップ3:アイテム・インベントリシステムの実装例
アイテムデータ定義:
|
1 2 3 4 5 6 7 8 9 10 11 12 13 14 15 16 17 18 19 |
using UnityEngine; [CreateAssetMenu(fileName = "New Item", menuName = "RPG/Item")] public class ItemData : ScriptableObject { public string itemName; public string description; public int itemID; public ItemType itemType; public int value; // 回復量、攻撃力など public Sprite itemIcon; public enum ItemType { Consumable, // 消費アイテム Equipment, // 装備品 Key // キーアイテム } } |
インベントリシステム:
|
1 2 3 4 5 6 7 8 9 10 11 12 13 14 15 16 17 18 19 20 21 22 23 24 25 26 27 28 29 30 31 32 33 34 35 36 37 38 39 40 41 42 43 44 45 46 47 48 49 50 51 52 53 54 55 56 57 58 59 60 61 62 63 64 65 66 67 68 69 70 71 72 73 74 75 76 77 78 79 80 81 82 83 84 85 86 87 88 89 90 91 92 93 94 |
using UnityEngine; using System.Collections.Generic; [System.Serializable] public class InventoryItem { public ItemData itemData; public int quantity; public InventoryItem(ItemData data, int qty = 1) { itemData = data; quantity = qty; } } public class Inventory : MonoBehaviour { [SerializeField] private List<InventoryItem> items = new List<InventoryItem>(); [SerializeField] private int maxSlots = 20; public void AddItem(ItemData itemData, int quantity = 1) { InventoryItem existingItem = items.Find(x => x.itemData.itemID == itemData.itemID); if (existingItem != null) { // 既存アイテムの数量を増やす existingItem.quantity += quantity; Debug.Log($"Added {quantity} {itemData.itemName}. Total: {existingItem.quantity}"); } else { // 新規アイテムを追加 if (items.Count >= maxSlots) { Debug.Log("Inventory is full!"); return; } items.Add(new InventoryItem(itemData, quantity)); Debug.Log($"Added {quantity} {itemData.itemName} to inventory"); } } public void RemoveItem(int itemID, int quantity = 1) { InventoryItem item = items.Find(x => x.itemData.itemID == itemID); if (item != null) { item.quantity -= quantity; if (item.quantity <= 0) { items.Remove(item); } Debug.Log($"Removed {quantity} {item.itemData.itemName}"); } } public void UseItem(int itemID, PlayerStatus playerStatus) { InventoryItem item = items.Find(x => x.itemData.itemID == itemID); if (item == null || item.quantity <= 0) { Debug.Log("Item not found!"); return; } if (item.itemData.itemType == ItemData.ItemType.Consumable) { // 消費アイテムの使用 switch (item.itemData.itemName) { case "Potion": playerStatus.currentHP = Mathf.Min(playerStatus.currentHP + item.itemData.value, playerStatus.maxHP); Debug.Log($"Used {item.itemData.itemName}! HP restored."); break; case "Mana Potion": playerStatus.currentMP = Mathf.Min(playerStatus.currentMP + item.itemData.value, playerStatus.maxMP); Debug.Log($"Used {item.itemData.itemName}! MP restored."); break; } RemoveItem(itemID, 1); } } public List<InventoryItem> GetItems() { return items; } } |
作業時間: アイテム・インベントリシステム実装で2〜3時間
ステップ4:クエストシステムの実装例
クエストデータ定義:
|
1 2 3 4 5 6 7 8 9 10 11 12 13 14 15 16 17 18 19 20 21 22 |
using UnityEngine; [CreateAssetMenu(fileName = "New Quest", menuName = "RPG/Quest")] public class QuestData : ScriptableObject { public string questName; public string description; public int questID; public QuestType questType; public int targetCount; // 討伐数、取得数など public int currentCount; public int rewardExp; public int rewardGold; public ItemData[] rewardItems; public enum QuestType { Kill, // 討伐クエスト Collect, // 収集クエスト Talk // 会話クエスト } } |
クエスト管理システム:
|
1 2 3 4 5 6 7 8 9 10 11 12 13 14 15 16 17 18 19 20 21 22 23 24 25 26 27 28 29 30 31 32 33 34 35 36 37 38 39 40 41 42 43 44 45 46 47 48 49 50 51 52 53 54 55 56 |
using UnityEngine; using System.Collections.Generic; public class QuestManager : MonoBehaviour { [SerializeField] private List<QuestData> activeQuests = new List<QuestData>(); [SerializeField] private List<QuestData> completedQuests = new List<QuestData>(); public void AcceptQuest(QuestData quest) { if (!activeQuests.Contains(quest)) { activeQuests.Add(quest); quest.currentCount = 0; Debug.Log($"Quest accepted: {quest.questName}"); } } public void UpdateQuest(QuestData.QuestType questType, int amount = 1) { foreach (QuestData quest in activeQuests) { if (quest.questType == questType) { quest.currentCount += amount; Debug.Log($"Quest progress: {quest.questName} ({quest.currentCount}/{quest.targetCount})"); if (quest.currentCount >= quest.targetCount) { CompleteQuest(quest); } } } } void CompleteQuest(QuestData quest) { activeQuests.Remove(quest); completedQuests.Add(quest); // 報酬を付与 PlayerStatus playerStatus = FindObjectOfType<PlayerStatus>(); if (playerStatus != null) { playerStatus.AddExp(quest.rewardExp); } Debug.Log($"Quest completed: {quest.questName}"); Debug.Log($"Reward: {quest.rewardExp} EXP, {quest.rewardGold} Gold"); } public List<QuestData> GetActiveQuests() { return activeQuests; } } |
作業時間: クエストシステム実装で2〜3時間
RPGシステムを組み合わせて完成形を作る方法

個別のシステムを組み合わせて、完成形のRPGを作ります。
システム間の連携
バトルとレベルアップの連携:
|
1 2 3 4 5 6 7 8 9 10 11 12 13 14 |
public class BattleLevelUpIntegration : MonoBehaviour { [SerializeField] private TurnBasedBattle battleSystem; [SerializeField] private PlayerStatus playerStatus; void Start() { // バトル勝利時に経験値を追加 battleSystem.OnVictory += () => { playerStatus.AddExp(50); }; } } |
クエストとバトルの連携:
|
1 2 3 4 5 6 7 8 9 10 11 12 13 14 |
public class QuestBattleIntegration : MonoBehaviour { [SerializeField] private QuestManager questManager; [SerializeField] private TurnBasedBattle battleSystem; void Start() { // 敵を倒したときにクエストを更新 battleSystem.OnEnemyDefeated += () => { questManager.UpdateQuest(QuestData.QuestType.Kill, 1); }; } } |
作業時間: システム連携で1〜2日
RPGシステム実装を学ぶならUnity入門の森がおすすめ

この記事では、Unityで実装できるRPGシステムの具体例とコードの要点を全体像として整理しました。
技術の方向性はつかめますが、実際には…
- どの手順をどの順番で実装すればいいか分からない
- コピペで動くサンプルコードがほしい
- バトルシステムやレベルアップシステムを実プロジェクトで実装したい
- データとロジックの分離の具体的な実装方法が知りたい
- つまずいた時に補足解説が欲しい
といった「実装段階の壁」で多くの人が止まってしまいます。
こうした「記事の知識だけでは補えない部分」を埋めたい人には、Unity入門の森の講座が最適です。
何ができるか
- バトルシステムの実装(ターン制・リアルタイム)を学べる
- レベルアップシステムの実装方法を学べる
- アイテム・インベントリシステムの実装方法を学べる
- クエストシステムの実装方法を学べる
- システム間の連携方法を学べる
理論だけでなく実際に動くコードを提供し、データとロジックの分離など設計の基礎を解説しています。
コピペで動くサンプルコードが提供され、実装の流れも詳しく説明しているため、理解しやすい構成です。
自分だけのRPGを作りたいなら!Unity入門の森のRPG制作講座で本格ゲーム開発に挑戦しよう
Unity入門の森には、初心者から中上級者まで対応したRPG制作講座が揃っています。トレンドのデッキ構築型から超本格派3DダンジョンRPGまで、作りたいRPGのスタイルに合わせて選んでみてください。
Unity ノンフィールドRPG+スレスパ風JRPG講座【Unity6対応!デッキ構築×JRPGをスマホ向けに作れる!】
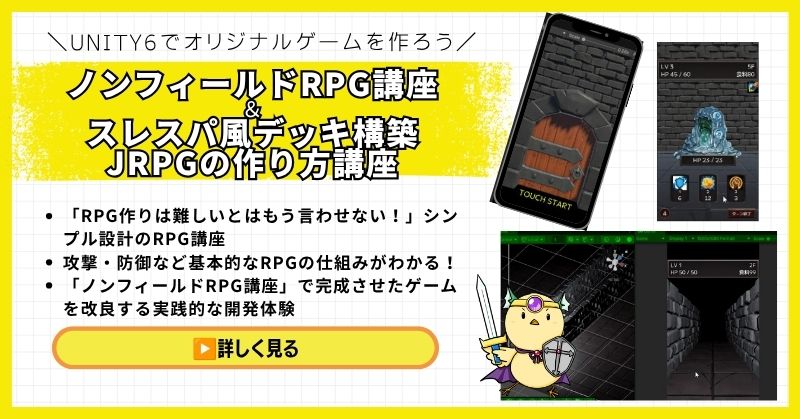
- Unity6対応・スマホ化対応で最新環境のゲーム開発が学べる
- Slay the Spire風のデッキ構築システム×JRPGの組み合わせを実装
- 初心者でも取り組みやすい丁寧な解説構成
- ノンフィールドRPGとデッキ構築JRPGの2つを合わせて学ぶのがおすすめ
Unity ノンフィールドRPGの作り方講座+Slay the Spire風デッキ構築JRPGの作り方講座は、今もっともトレンドのデッキ構築型ゲームシステムをJRPGと組み合わせて実装する方法を学べる講座です。
Unity6対応・スマホ化対応の最新カリキュラムで、デッキ構築の核となるシステムをしっかり習得できます。
「Slay the Spireみたいなゲームを自分でも作ってみたい!」という人の最初の一歩として最適な講座です。
Unity6対応・スマホ化対応の最新カリキュラム
トレンドのデッキ構築×JRPGを最速で実装しよう
→ Slay the Spire風デッキ構築JRPG講座を見てみる
スマホ対応の最新環境で、ゲーム開発の第一歩を踏み出そう!
Unity 世界樹の迷宮風3DダンジョンRPGの作り方講座【全20回!ウィザードリィ・世界樹風の超本格派3DダンジョンRPGを作れる!】

- ウィザードリィ・世界樹の迷宮風の超本格派3DダンジョンRPGをゼロから開発
- オートマッピング・キャラメイク・スキルツリー・カウントタイムバトルを完全実装
- 日本・世界でも類を見ない本格3DダンジョンRPG講座
- スマホ化対応・全プロジェクトファイル付きで安心して完成まで到達できる
Unity 世界樹の迷宮風3DダンジョンRPGの作り方講座は、ウィザードリィ・世界樹の迷宮のような本格的な3DダンジョンRPGをゼロから作れるようになる、Unity入門の森最高峰の講座です。
オートマッピング・キャラメイキング・スキルツリー・カウントタイムバトル・アイテム合成・モンスター図鑑まで、RPGに必要な本格システムを全20回で徹底的に習得できます。ここまで本格的な3DダンジョンRPG講座は日本・世界でも類を見ません。
「プロレベルのインディゲーム開発スキルを手に入れたい」中・上級者に強くおすすめできる、Unity入門の森の技術の粋を詰め込んだ一本です。
世界唯一クラスの超本格派3DダンジョンRPGをゼロから完成させる
ウィザードリィ・世界樹風のダンジョンRPGでプロレベルのスキルを手に入れよう
→ 世界樹風3DダンジョンRPG講座を見てみる
Unity入門の森の技術の粋を全て叩き込んだ最高峰講座を今すぐチェック!
Unity 2DRPGの作り方講座(ドラクエ風)【全27回大ボリューム!王道コマンドバトルRPGを本格的に作りたい中上級者向け!】
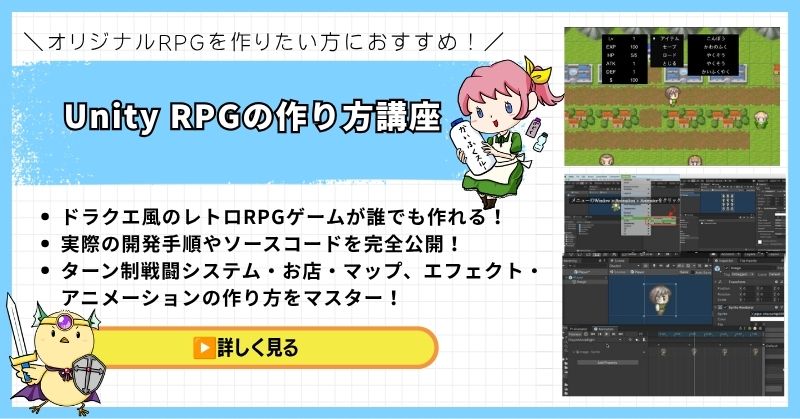
- 全27回という圧倒的なボリュームで王道RPGを徹底解説
- ドラクエ風コマンドバトルの本格的なシステムを一から実装
- マップ制作・戦闘システム・イベント管理まで実践的に習得
- 基礎から応用まで網羅した中上級者向けの充実カリキュラム
Unity 2DRPGの作り方講座(ドラクエ風)は、王道コマンドバトルRPGを本格的に作りたい人のための大ボリューム講座です。
全27回のカリキュラムで、マップ制作・コマンドバトル・イベント管理・セーブ機能まで、RPGに必要なシステムを基礎から実践レベルまで徹底的に習得できます。
「ドラクエのような本格的なRPGをUnityでゼロから作り上げたい」という中上級者に自信を持っておすすめできる一本です。
全27回・王道RPGシステムを徹底解説
本格的なドラクエ風2DRPGをUnityで作ろう
→ Unity 2DRPGの作り方講座を見てみる
全27回の圧倒的な丁寧さ!一生モノのコマンドバトル基礎を今すぐ手に入れよう
まとめ

RPG作例の要点をまとめます。
- データとロジックの分離: ScriptableObjectでデータを定義し、保守性を向上
- バトルシステム: ターン制・リアルタイム両対応の実装
- レベルアップシステム: 経験値管理、ステータス成長の実装
- アイテム・インベントリ: アイテム管理、使用処理の実装
- クエストシステム: クエスト管理、報酬付与の実装
- 初心者がつまずきやすい部分: データとロジックの分離、システム間の連携、設計パターンの適用
RPGシステムの実装は、個別のシステムを組み合わせて完成させます。
まずは最小構成(バトル、レベルアップ、アイテム)から始め、徐々に機能を追加していくのが挫折しないコツです。
RPGシステムの実装は複雑ですが、一つずつ要素を理解していけば必ず完成できます。
まずは最小構成から始めて、動作確認しながら機能を追加していきましょう。
あなたのオリジナルゲーム、今年こそ完成させませんか?
RPG・アクション・ホラー…Unityで本格ゲームを作りたい人のための学習サイトです。
実際に完成するゲームを題材に、
ソースコード・素材・プロジェクト一式をすべて公開。
仕事や学校の合間の1〜2時間でも、
「写経→改造」で自分のゲームまで作りきれる環境です。


コメント