

RTSゲームは、複雑に見えます。
しかし、基本要素を理解すれば、実装できます。
この記事では、簡易プロトタイプを作りながら解説します。
✨ この記事でわかること
- ユニット選択システムの実装
- 移動命令システムの実装
- 資源採集システムの実装
- 敵AIの実装
- 実装例とコード
RTSゲームは、まずは基本要素から実装しましょう。ユニット選択と移動命令が、最初のステップです。
\あなたにピッタリのシミュレーションゲーム制作講座を見つけよう!/
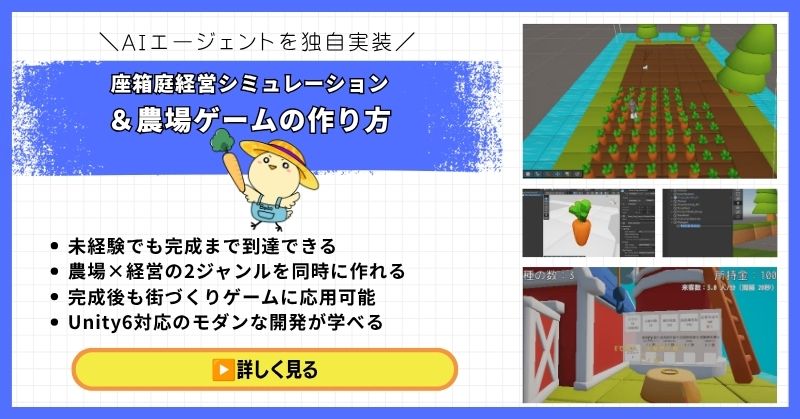
おすすめ第1位
経営シミュレーション×
農場ゲームの作り方講座
Unity6対応・農場×経営の2ジャンル融合。AIエージェントを独自実装できる唯一の講座。未経験でも完成まで到達できる丁寧な解説が魅力。
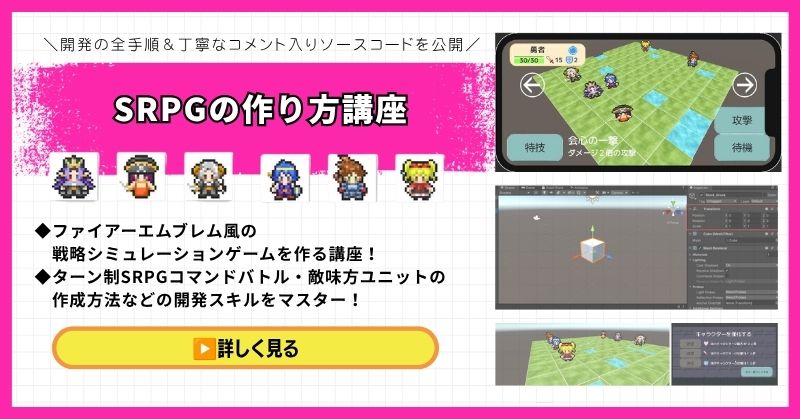
本格派・高難易度
UnityシミュレーションRPG
の作り方講座(SRPG)
本格SRPGのAI設計・グリッドシステムを全16回で習得。制作難易度が高いSRPGを作れるスキルは、他と大きく差がつく強みになります。
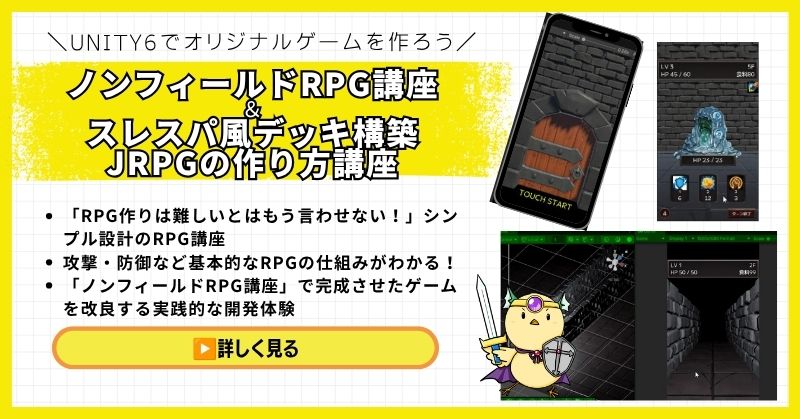
初心者にもおすすめ
Unity ノンフィールドRPG
+スレスパ風JRPG講座
Slay the Spire風デッキ構築×JRPGをUnityで実装。Unity6・スマホ化対応で、初心者がゲーム開発の第一歩を踏み出すのに最適な講座です。
あなたのオリジナルゲーム、今年こそ完成させませんか?
RPG・アクション・ホラー…Unityで本格ゲームを作りたい人のための学習サイトです。
実際に完成するゲームを題材に、
ソースコード・素材・プロジェクト一式をすべて公開。
仕事や学校の合間の1〜2時間でも、
「写経→改造」で自分のゲームまで作りきれる環境です。
ユニット選択システムの実装

ユニット選択は、RTSの基本操作です。
実装方法を紹介します。
マウス選択の実装
|
1 2 3 4 5 6 7 8 9 10 11 12 13 14 15 16 17 18 19 20 21 22 23 24 25 26 27 28 29 30 31 32 33 34 35 36 37 38 39 40 41 42 43 44 45 46 47 48 49 50 51 52 53 54 55 56 57 58 59 60 61 62 63 64 65 66 67 68 69 70 71 72 73 74 75 76 77 78 79 80 81 82 83 84 85 86 87 88 89 90 91 92 93 94 95 96 97 98 99 100 101 102 103 104 105 106 107 108 109 110 |
using UnityEngine; using System.Collections.Generic; public class UnitSelector : MonoBehaviour { public Camera mainCamera; public LayerMask unitLayer; private List<Unit> selectedUnits = new List<Unit>(); private Vector3 dragStartPosition; private bool isDragging = false; void Update() { // 単一選択 if (Input.GetMouseButtonDown(0)) { SelectSingleUnit(); } // 複数選択(ドラッグ) if (Input.GetMouseButton(0)) { if (!isDragging) { dragStartPosition = Input.mousePosition; isDragging = true; } } if (Input.GetMouseButtonUp(0)) { if (isDragging) { SelectMultipleUnits(); isDragging = false; } } } void SelectSingleUnit() { Ray ray = mainCamera.ScreenPointToRay(Input.mousePosition); RaycastHit hit; if (Physics.Raycast(ray, out hit, Mathf.Infinity, unitLayer)) { Unit unit = hit.collider.GetComponent<Unit>(); if (unit != null) { ClearSelection(); SelectUnit(unit); } } else { ClearSelection(); } } void SelectMultipleUnits() { // ドラッグ範囲内のユニットを選択 Vector3 dragEndPosition = Input.mousePosition; Rect selectionRect = GetSelectionRect(dragStartPosition, dragEndPosition); ClearSelection(); foreach (var unit in FindObjectsOfType<Unit>()) { Vector3 screenPos = mainCamera.WorldToScreenPoint(unit.transform.position); if (selectionRect.Contains(screenPos)) { SelectUnit(unit); } } } Rect GetSelectionRect(Vector3 start, Vector3 end) { float x = Mathf.Min(start.x, end.x); float y = Mathf.Min(start.y, end.y); float width = Mathf.Abs(end.x - start.x); float height = Mathf.Abs(end.y - start.y); return new Rect(x, y, width, height); } void SelectUnit(Unit unit) { selectedUnits.Add(unit); unit.SetSelected(true); } void ClearSelection() { foreach (var unit in selectedUnits) { unit.SetSelected(false); } selectedUnits.Clear(); } public List<Unit> GetSelectedUnits() { return selectedUnits; } } |
このコードで、ユニット選択システムが実装できます。
クリックで単一選択、ドラッグで複数選択が可能です。
移動命令システムの実装
移動命令は、RTSの核心です。
実装方法を紹介します。
右クリック移動の実装
|
1 2 3 4 5 6 7 8 9 10 11 12 13 14 15 16 17 18 19 20 21 22 23 24 25 26 27 28 29 30 31 32 33 34 35 36 37 38 39 40 41 42 43 44 45 46 47 48 49 50 51 52 53 54 55 56 57 58 59 60 61 62 63 64 65 66 67 |
using UnityEngine; using System.Collections.Generic; public class UnitMovement : MonoBehaviour { public float moveSpeed = 5f; public float stopDistance = 0.5f; private Vector3 targetPosition; private bool hasTarget = false; void Update() { if (hasTarget) { MoveToTarget(); } } public void SetTargetPosition(Vector3 position) { targetPosition = position; hasTarget = true; } void MoveToTarget() { Vector3 direction = (targetPosition - transform.position).normalized; float distance = Vector3.Distance(transform.position, targetPosition); if (distance <= stopDistance) { hasTarget = false; return; } transform.position += direction * moveSpeed * Time.deltaTime; } } public class MovementCommand : MonoBehaviour { public UnitSelector unitSelector; public Camera mainCamera; public LayerMask groundLayer; void Update() { // 右クリックで移動命令 if (Input.GetMouseButtonDown(1)) { Ray ray = mainCamera.ScreenPointToRay(Input.mousePosition); RaycastHit hit; if (Physics.Raycast(ray, out hit, Mathf.Infinity, groundLayer)) { List<Unit> selectedUnits = unitSelector.GetSelectedUnits(); foreach (var unit in selectedUnits) { unit.GetComponent<UnitMovement>().SetTargetPosition(hit.point); } } } } } |
このコードで、移動命令システムが実装できます。
右クリックで、選択したユニットが移動します。
複数ユニットの隊列移動
|
1 2 3 4 5 6 7 8 9 10 11 12 13 14 15 16 17 18 19 20 21 22 23 24 25 26 |
public class FormationMovement : MonoBehaviour { public void MoveFormation(List<Unit> units, Vector3 targetPosition) { // 隊列の配置を計算 int unitCount = units.Count; float spacing = 2f; int columns = Mathf.CeilToInt(Mathf.Sqrt(unitCount)); for (int i = 0; i < unitCount; i++) { int row = i / columns; int col = i % columns; Vector3 offset = new Vector3( (col - columns / 2f) * spacing, 0f, row * spacing ); Vector3 unitTarget = targetPosition + offset; units[i].GetComponent<UnitMovement>().SetTargetPosition(unitTarget); } } } |
複数ユニットを隊列で移動させます。
四角形の隊形で配置します。
資源採集システムの実装
資源採集は、RTSの経済システムです。
実装方法を紹介します。
資源採集の実装
|
1 2 3 4 5 6 7 8 9 10 11 12 13 14 15 16 17 18 19 20 21 22 23 24 25 26 27 28 29 30 31 32 33 34 35 36 37 38 39 40 41 42 43 44 45 46 47 48 49 50 51 52 53 54 55 56 57 58 59 60 61 62 63 64 65 66 67 68 69 70 71 72 73 74 75 76 77 78 79 80 81 82 83 84 85 86 87 88 89 90 91 92 93 94 95 96 |
using UnityEngine; using System.Collections; public class ResourceCollector : MonoBehaviour { public ResourceManager resourceManager; public float collectRate = 10f; // 1秒あたりの採集量 public float collectInterval = 1f; private ResourceNode currentNode = null; private bool isCollecting = false; public void StartCollecting(ResourceNode node) { currentNode = node; isCollecting = true; StartCoroutine(CollectResource()); } public void StopCollecting() { isCollecting = false; currentNode = null; } IEnumerator CollectResource() { while (isCollecting && currentNode != null) { if (currentNode.HasResource()) { ResourceCost collected = currentNode.CollectResource(collectRate); resourceManager.AddResources(collected); } else { StopCollecting(); } yield return new WaitForSeconds(collectInterval); } } } public class ResourceNode : MonoBehaviour { public ResourceType resourceType; public float maxAmount = 1000f; private float currentAmount; void Start() { currentAmount = maxAmount; } public bool HasResource() { return currentAmount > 0f; } public ResourceCost CollectResource(float amount) { float collected = Mathf.Min(amount, currentAmount); currentAmount -= collected; ResourceCost cost = new ResourceCost(); switch (resourceType) { case ResourceType.Gold: cost.gold = Mathf.RoundToInt(collected); break; case ResourceType.Wood: cost.wood = Mathf.RoundToInt(collected); break; case ResourceType.Stone: cost.stone = Mathf.RoundToInt(collected); break; } if (currentAmount <= 0f) { Destroy(gameObject); } return cost; } } public enum ResourceType { Gold, Wood, Stone } |
このコードで、資源採集システムが実装できます。
ユニットが資源ノードに近づくと、自動で採集を開始します。
資源採集は、ユニットが資源ノードに近づいたら自動で開始するようにしましょう。プレイヤーの操作を減らせます。
敵AIの実装
敵AIは、RTSの難易度を左右します。
実装方法を紹介します。
基本的な敵AI
|
1 2 3 4 5 6 7 8 9 10 11 12 13 14 15 16 17 18 19 20 21 22 23 24 25 26 27 28 29 30 31 32 33 34 35 36 37 38 39 40 41 42 43 44 45 46 47 48 49 50 51 52 53 54 55 56 57 58 59 60 61 62 63 64 65 66 67 68 69 70 71 72 73 74 75 76 77 |
using UnityEngine; using System.Collections.Generic; public class EnemyAI : MonoBehaviour { public List<Unit> enemyUnits = new List<Unit>(); public List<Unit> playerUnits = new List<Unit>(); public ResourceManager resourceManager; public float aiUpdateInterval = 2f; private float lastUpdateTime = 0f; void Update() { if (Time.time - lastUpdateTime >= aiUpdateInterval) { UpdateAI(); lastUpdateTime = Time.time; } } void UpdateAI() { // 1. 資源採集の優先度をチェック if (resourceManager.gold < 500) { SendUnitsToCollectResources(); } // 2. 敵を探して攻撃 foreach (var enemyUnit in enemyUnits) { Unit nearestPlayer = FindNearestPlayerUnit(enemyUnit); if (nearestPlayer != null) { float distance = Vector3.Distance(enemyUnit.transform.position, nearestPlayer.transform.position); if (distance <= enemyUnit.attackRange) { enemyUnit.Attack(nearestPlayer); } else { enemyUnit.MoveTo(nearestPlayer.transform.position); } } } } void SendUnitsToCollectResources() { // 資源採集を命令 } Unit FindNearestPlayerUnit(Unit enemyUnit) { Unit nearest = null; float minDistance = float.MaxValue; foreach (var player in playerUnits) { if (player.stats.currentHP <= 0) continue; float distance = Vector3.Distance(enemyUnit.transform.position, player.transform.position); if (distance < minDistance) { minDistance = distance; nearest = player; } } return nearest; } } |
このコードで、基本的な敵AIが実装できます。
資源採集と敵への攻撃を自動で実行します。
実装例:完全なRTSシステム

実際に使える、完全なRTSシステムの実装例を紹介します。
|
1 2 3 4 5 6 7 8 9 10 11 12 13 14 15 16 17 18 19 20 21 22 23 24 25 26 27 28 29 30 31 32 33 |
using UnityEngine; using System.Collections.Generic; public class CompleteRTSSystem : MonoBehaviour { [Header("システム")] public UnitSelector unitSelector; public MovementCommand movementCommand; public ResourceManager resourceManager; public EnemyAI enemyAI; [Header("ユニット")] public List<Unit> playerUnits = new List<Unit>(); public List<Unit> enemyUnits = new List<Unit>(); void Start() { InitializeGame(); } void InitializeGame() { // 初期ユニットを配置 // 資源ノードを配置 } void Update() { // ユニット選択と移動命令は、UnitSelectorとMovementCommandで処理 // 敵AIは、EnemyAIで処理 } } |
このコードで、完全なRTSシステムが実装できます。
ユニット選択、移動命令、資源採集、敵AIを統合しています。
よくある質問(FAQ)
シミュレーションゲームを作りたいなら!Unity入門の森のシミュレーション制作講座で本格ゲーム開発に挑戦しよう
Unity入門の森には、経営・農場・SRPGなど幅広いシミュレーションゲームを作れる講座が揃っています。作りたいジャンルや目標スキルに合わせて選んでみてください。
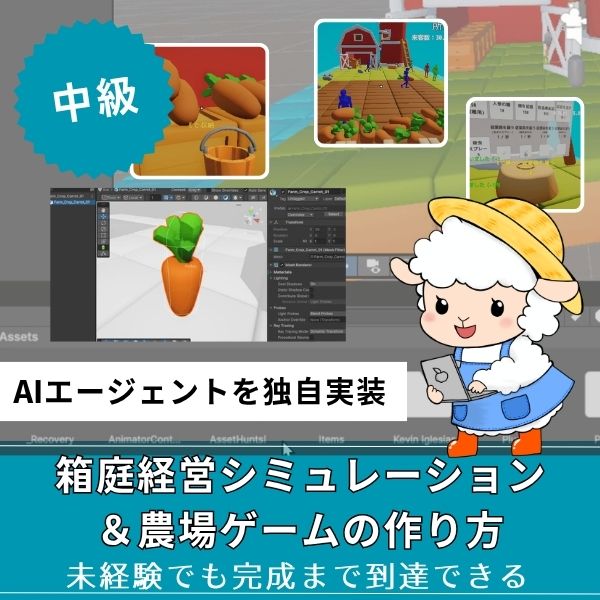
経営シミュレーション×農場ゲームの作り方講座【Unity6対応!AIエージェント実装まで学べる唯一の講座!】
- 未経験でも完成まで到達できる丁寧な解説
- 農場×経営の2ジャンルを同時に作れる
- 賢く自律行動するAIエージェントを独自実装できる
- 完成後も街づくりゲームに応用可能な高い拡張性
- Unity6対応のモダンな開発手法が身につく
経営シミュレーション×農場ゲームの作り方講座は、シムシティ・牧場物語・どうぶつの森のようなゲームを自分で作れるようになる講座です。
農作物の育成・収穫・販売システムはもちろん、NavMeshを使ったお客さんAIの来店・購入・帰宅の自律行動や、ルールベースAIによる従業員エージェントの実装まで、本格的なゲームAI開発が学べます。
箱庭経営シミュレーションという複合的な題材を通して、Unity中級者・上級者に必要な幅広い開発スキルを一気に習得できる講座です。
Unity6対応・AIエージェント実装まで学べる
農場も経営もコレ1本で完成させよう
→ 経営シミュレーション×農場ゲーム講座を見てみる
応用・拡張性は無限大!自律行動するAIを実装して一歩先のゲーム開発へ!
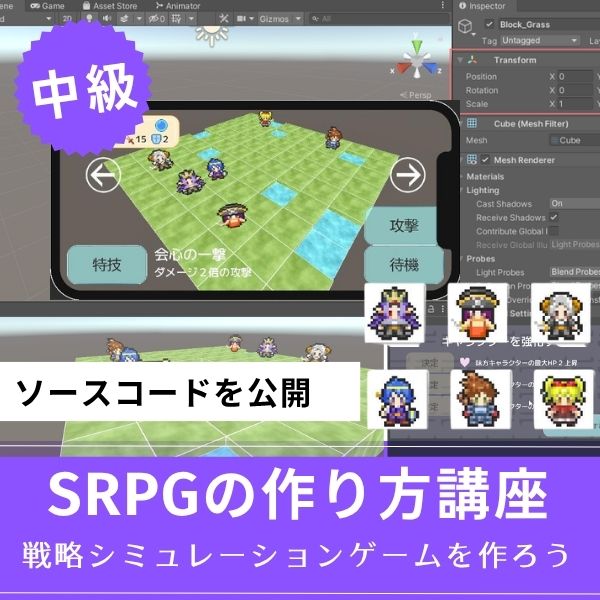
UnityシミュレーションRPGの作り方講座(SRPG)【全16回!本格タクティクスSRPGをゼロから作れる!】
- ファイアーエムブレム風の本格タクティクスSRPGを0から開発
- 書籍でも情報が少ない戦術シミュレーションを丁寧に解説
- 難解なグリッドシステム・敵AI戦術を完全攻略できる
- 全文コメント入りソースコード付きで初心者でも理解しながら進められる
- Unity入門の森の最高傑作の一つ・解説の丁寧さはトップクラス
UnityシミュレーションRPGの作り方講座(SRPG)は、ファイアーエムブレム・タクティクスオウガ・FFタクティクスのようなターン制ストラテジーシミュレーションゲームを作るための講座です。
移動可能エリアの設定・ターン進行管理・コマンド選択型戦闘・敵AI戦術ストラテジーなど、本格SRPGに必要な機能をすべてゼロから開発します。開発難易度が高いシステムも、全文コメント入りのソースコードと丁寧な解説で確実に理解しながら進められます。
「SRPGを作れる」というスキルは希少価値が高く、Unityエンジニアとして中・上級者を目指す人に強くおすすめの一本です。
本格タクティクスSRPGをゼロから完成させる
難解なグリッドシステムと敵AIを完全攻略しよう
→ UnityシミュレーションRPG(SRPG)講座を見てみる
他では学べない当サイト最高傑作!エンジニアとして頭一つ抜ける希少スキルを今すぐ。
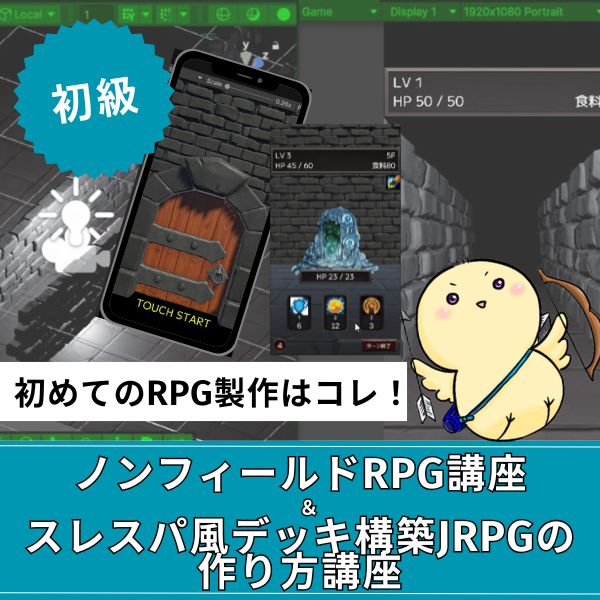
Unity ノンフィールドRPG+スレスパ風JRPG講座【Unity6対応!デッキ構築×JRPGをスマホ向けに作れる!】
- Unity6対応・スマホ化対応で最新環境のゲーム開発が学べる
- Slay the Spire風のデッキ構築システム×JRPGの組み合わせを実装
- 初心者でも取り組みやすい丁寧な解説構成
- ノンフィールドRPGとデッキ構築JRPGの2つを合わせて学ぶのがおすすめ
Unity ノンフィールドRPGの作り方講座+Slay the Spire風デッキ構築JRPGの作り方講座は、今もっともトレンドのデッキ構築型ゲームシステムをJRPGと組み合わせて実装する方法を学べる講座です。
Unity6対応・スマホ化対応の最新カリキュラムで、デッキ構築の核となるシステムをしっかり習得できます。シミュレーション系の設計思想とも親和性が高く、ゲーム開発の幅を広げたい方にもおすすめです。
「Slay the Spireみたいなゲームを自分でも作ってみたい!」という人の最初の一歩として最適な講座です。
Unity6対応・スマホ化対応の最新カリキュラム
トレンドのデッキ構築×JRPGを最速で実装しよう
→ Slay the Spire風デッキ構築JRPG講座を見てみる
SLGの設計思想とも親和性抜群!トレンドシステムを取り入れて開発の幅を広げよう!
まとめ
RTSゲームは、基本要素を理解すれば実装できます。
まずはユニット選択と移動命令から始めましょう。
✅ 今日から始める3ステップ
- ステップ1:ユニット選択システムを実装する(所要2時間)
- ステップ2:移動命令システムを実装する(所要2時間)
- ステップ3:資源採集システムを実装する(所要3時間)
本格的にUnityを学びたい方は、Unity入門の森で実践的なスキルを身につけましょう。
あなたのペースで、少しずつ進めていけば大丈夫です。
あなたのオリジナルゲーム、今年こそ完成させませんか?
RPG・アクション・ホラー…Unityで本格ゲームを作りたい人のための学習サイトです。
実際に完成するゲームを題材に、
ソースコード・素材・プロジェクト一式をすべて公開。
仕事や学校の合間の1〜2時間でも、
「写経→改造」で自分のゲームまで作りきれる環境です。


コメント