

SRPGの敵AIは、単純に見えますが、実装は複雑です。
ターゲット選択と行動判断が、難易度を左右します。
この記事では、実装方法を詳しく解説します。
✨ この記事でわかること
- シンプルなルールベースAIの実装
- ターゲット選択のアルゴリズム
- 行動候補のスコアリング
- 安全度評価の実装
- 段階的に賢くする方法

敵AIは、最初はシンプルに実装しましょう。後から、より賢い判断を追加していけば大丈夫です。
\あなたにピッタリのシミュレーションゲーム制作講座を見つけよう!/
おすすめ第1位
経営シミュレーション×
農場ゲームの作り方講座

Unity6対応・農場×経営の2ジャンル融合。AIエージェントを独自実装できる唯一の講座。未経験でも完成まで到達できる丁寧な解説が魅力。
本格派・高難易度
UnityシミュレーションRPG
の作り方講座(SRPG)
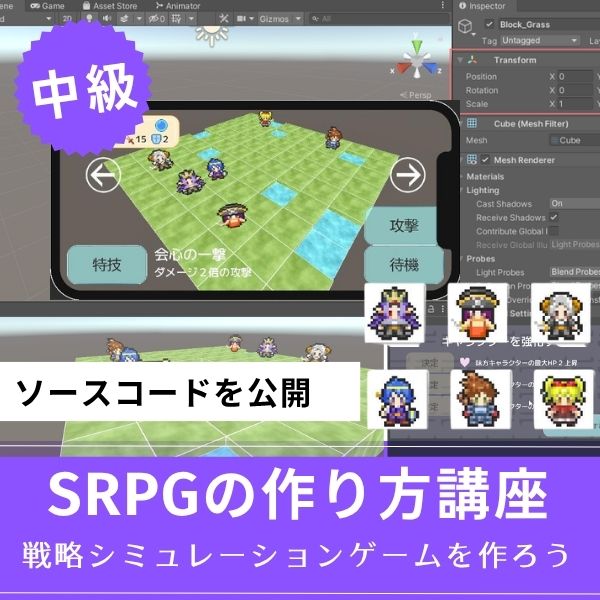
本格SRPGのAI設計・グリッドシステムを全16回で習得。制作難易度が高いSRPGを作れるスキルは、他と大きく差がつく強みになります。
初心者にもおすすめ
Unity ノンフィールドRPG
+スレスパ風JRPG講座
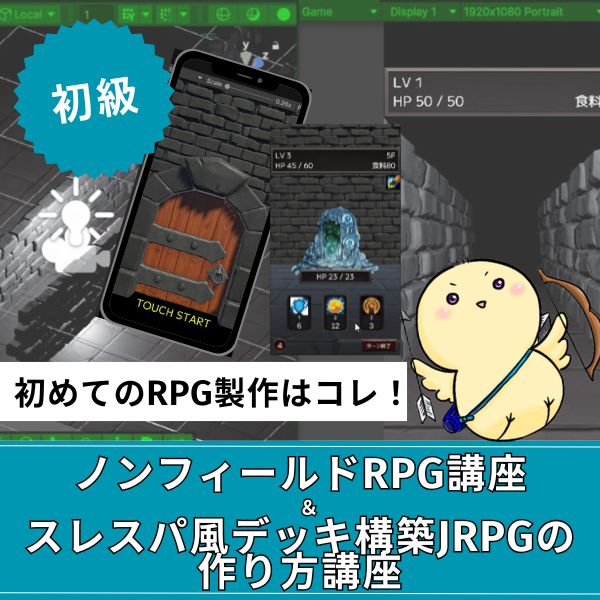
Slay the Spire風デッキ構築×JRPGをUnityで実装。Unity6・スマホ化対応で、初心者がゲーム開発の第一歩を踏み出すのに最適な講座です。
あなたのオリジナルゲーム、今年こそ完成させませんか?
RPG・アクション・ホラー…Unityで本格ゲームを作りたい人のための学習サイトです。
実際に完成するゲームを題材に、
ソースコード・素材・プロジェクト一式をすべて公開。
仕事や学校の合間の1〜2時間でも、
「写経→改造」で自分のゲームまで作りきれる環境です。
シンプルなルールベースAI

最初は、シンプルなルールベースAIから始めます。
実装方法を紹介します。
基本的な敵AI
|
1 2 3 4 5 6 7 8 9 10 11 12 13 14 15 16 17 18 19 20 21 22 23 24 25 26 27 28 29 30 31 32 33 34 35 36 37 38 39 40 41 42 43 44 45 46 47 48 49 50 51 52 53 54 55 56 57 58 59 60 61 62 63 64 65 66 67 68 69 70 71 72 73 74 75 76 77 78 79 80 81 82 83 84 85 86 87 88 89 90 91 92 93 94 95 96 97 98 99 100 101 102 103 104 |
using UnityEngine; using System.Collections.Generic; public class SimpleEnemyAI : MonoBehaviour { private Unit enemyUnit; private GridMap gridMap; private List<Unit> playerUnits; void Start() { enemyUnit = GetComponent<Unit>(); gridMap = FindObjectOfType<GridMap>(); playerUnits = FindPlayerUnits(); } public void ExecuteTurn() { // 1. 最も近いプレイヤーユニットを探す Unit target = FindNearestPlayerUnit(); if (target == null) return; // 2. 攻撃範囲内にいるかチェック if (IsInAttackRange(target)) { Attack(target); } else { // 3. 移動して近づく MoveTowards(target); } } Unit FindNearestPlayerUnit() { Unit nearest = null; float minDistance = float.MaxValue; foreach (var player in playerUnits) { if (player.stats.currentHP <= 0) continue; int distance = Mathf.Abs(player.gridX - enemyUnit.gridX) + Mathf.Abs(player.gridY - enemyUnit.gridY); if (distance < minDistance) { minDistance = distance; nearest = player; } } return nearest; } bool IsInAttackRange(Unit target) { int distance = Mathf.Abs(target.gridX - enemyUnit.gridX) + Mathf.Abs(target.gridY - enemyUnit.gridY); return distance <= enemyUnit.stats.attackRange; } void Attack(Unit target) { FindObjectOfType<BattleSystem>().ExecuteAttack(enemyUnit, target); } void MoveTowards(Unit target) { // 簡易的な移動:目標に向かって1マス進む int dx = target.gridX - enemyUnit.gridX; int dy = target.gridY - enemyUnit.gridY; int moveX = 0; int moveY = 0; if (Mathf.Abs(dx) > Mathf.Abs(dy)) { moveX = dx > 0 ? 1 : -1; } else { moveY = dy > 0 ? 1 : -1; } int newX = enemyUnit.gridX + moveX; int newY = enemyUnit.gridY + moveY; if (gridMap.IsValidPosition(newX, newY) && !gridMap.HasObstacle(newX, newY)) { enemyUnit.SetPosition(newX, newY, gridMap); } } List<Unit> FindPlayerUnits() { List<Unit> players = new List<Unit>(); // プレイヤーユニットを取得 return players; } } |
このコードで、基本的な敵AIが実装できます。
最も近いプレイヤーユニットを探し、攻撃範囲内なら攻撃、範囲外なら移動します。
ターゲット選択のアルゴリズム
ターゲット選択は、敵AIの核心です。
より賢い選択方法を紹介します。
スコアリングによるターゲット選択
|
1 2 3 4 5 6 7 8 9 10 11 12 13 14 15 16 17 18 19 20 21 22 23 24 25 26 27 28 29 30 31 32 33 34 35 36 37 38 39 40 41 42 43 44 45 46 47 48 49 50 |
using UnityEngine; using System.Collections.Generic; using System.Linq; public class TargetSelector { public Unit SelectBestTarget(Unit enemy, List<Unit> playerUnits, GridMap gridMap) { Unit bestTarget = null; float bestScore = float.MinValue; foreach (var player in playerUnits) { if (player.stats.currentHP <= 0) continue; float score = CalculateTargetScore(enemy, player, gridMap); if (score > bestScore) { bestScore = score; bestTarget = player; } } return bestTarget; } float CalculateTargetScore(Unit enemy, Unit target, GridMap gridMap) { float score = 0f; // 1. 距離スコア(近いほど高い) int distance = Mathf.Abs(target.gridX - enemy.gridX) + Mathf.Abs(target.gridY - enemy.gridY); score += 100f / (distance + 1); // 2. HPスコア(低いほど高い) float hpRatio = (float)target.stats.currentHP / target.stats.maxHP; score += (1f - hpRatio) * 50f; // 3. 攻撃力スコア(高いほど高い、優先的に倒す) score += target.stats.attack * 0.5f; // 4. 防御力スコア(低いほど高い、倒しやすい) score -= target.stats.defense * 0.3f; return score; } } |
このコードで、スコアリングによるターゲット選択が実装できます。
距離・HP・攻撃力・防御力を考慮して、最適なターゲットを選びます。
✅ ターゲット選択の基準
- 距離:近いほど優先(移動コストが少ない)
- HP:低いほど優先(倒しやすい)
- 攻撃力:高いほど優先(脅威度が高い)
- 防御力:低いほど優先(ダメージが出やすい)
行動候補のスコアリング

行動候補をスコアリングして、最適な行動を選びます。
実装方法を紹介します。
行動候補の生成
|
1 2 3 4 5 6 7 8 9 10 11 12 13 14 15 16 17 18 19 20 21 22 23 24 25 26 27 28 29 30 31 32 33 34 35 36 37 38 39 40 41 42 43 44 45 46 47 48 49 50 51 52 53 54 55 56 57 58 59 60 61 62 63 64 65 66 67 68 69 70 71 72 73 74 75 76 77 78 79 80 81 82 83 84 85 86 87 88 89 90 91 92 93 94 95 96 97 98 99 100 101 102 103 104 105 106 107 108 109 110 111 112 113 114 115 116 117 118 119 120 121 122 123 124 125 126 127 128 129 130 131 132 133 134 135 136 137 138 139 140 141 142 143 144 145 146 147 148 149 150 151 152 153 154 |
using UnityEngine; using System.Collections.Generic; using System.Linq; [System.Serializable] public class ActionCandidate { public ActionType actionType; public Vector2Int targetPosition; public Unit targetUnit; public float score; } public enum ActionType { Move, Attack, Wait, Skill } public class ActionScorer { public ActionCandidate SelectBestAction(Unit enemy, List<Unit> playerUnits, GridMap gridMap) { List<ActionCandidate> candidates = new List<ActionCandidate>(); // 1. 移動候補を生成 GenerateMoveCandidates(enemy, playerUnits, gridMap, candidates); // 2. 攻撃候補を生成 GenerateAttackCandidates(enemy, playerUnits, gridMap, candidates); // 3. 待機候補を生成 candidates.Add(new ActionCandidate { actionType = ActionType.Wait, score = 0f }); // 4. 最高スコアの行動を選択 return candidates.OrderByDescending(c => c.score).First(); } void GenerateMoveCandidates(Unit enemy, List<Unit> playerUnits, GridMap gridMap, List<ActionCandidate> candidates) { // 移動範囲内の全マスをチェック for (int x = -enemy.moveRange; x <= enemy.moveRange; x++) { for (int y = -enemy.moveRange; y <= enemy.moveRange; y++) { int distance = Mathf.Abs(x) + Mathf.Abs(y); if (distance <= enemy.moveRange) { int targetX = enemy.gridX + x; int targetY = enemy.gridY + y; if (gridMap.IsValidPosition(targetX, targetY) && !gridMap.HasObstacle(targetX, targetY)) { float score = ScoreMovePosition(enemy, new Vector2Int(targetX, targetY), playerUnits, gridMap); candidates.Add(new ActionCandidate { actionType = ActionType.Move, targetPosition = new Vector2Int(targetX, targetY), score = score }); } } } } float ScoreMovePosition(Unit enemy, Vector2Int position, List<Unit> playerUnits, GridMap gridMap) { float score = 0f; // 1. 最も近いプレイヤーへの距離 float minDistance = float.MaxValue; foreach (var player in playerUnits) { if (player.stats.currentHP <= 0) continue; int distance = Mathf.Abs(player.gridX - position.x) + Mathf.Abs(player.gridY - position.y); minDistance = Mathf.Min(minDistance, distance); } score += 100f / (minDistance + 1); // 2. 安全度(プレイヤーからの距離) float safetyScore = CalculateSafety(position, playerUnits); score += safetyScore * 20f; return score; } void GenerateAttackCandidates(Unit enemy, List<Unit> playerUnits, GridMap gridMap, List<ActionCandidate> candidates) { foreach (var player in playerUnits) { if (player.stats.currentHP <= 0) continue; int distance = Mathf.Abs(player.gridX - enemy.gridX) + Mathf.Abs(player.gridY - enemy.gridY); if (distance <= enemy.stats.attackRange) { float score = ScoreAttack(enemy, player); candidates.Add(new ActionCandidate { actionType = ActionType.Attack, targetUnit = player, score = score }); } } } float ScoreAttack(Unit enemy, Unit target) { float score = 0f; // 1. 与えられるダメージ int damage = enemy.stats.attack - target.stats.defense; score += damage * 10f; // 2. ターゲットのHP(低いほど高い) float hpRatio = (float)target.stats.currentHP / target.stats.maxHP; score += (1f - hpRatio) * 50f; // 3. ターゲットの攻撃力(高いほど高い、優先的に倒す) score += target.stats.attack * 5f; return score; } float CalculateSafety(Vector2Int position, List<Unit> playerUnits) { float minDistance = float.MaxValue; foreach (var player in playerUnits) { if (player.stats.currentHP <= 0) continue; int distance = Mathf.Abs(player.gridX - position.x) + Mathf.Abs(player.gridY - position.y); minDistance = Mathf.Min(minDistance, distance); } return minDistance; } } |
このコードで、行動候補をスコアリングできます。
移動・攻撃・待機の各候補を評価し、最適な行動を選びます。
安全度評価の実装

安全度評価は、敵AIが生き残るために重要です。
実装方法を紹介します。
安全度計算
|
1 2 3 4 5 6 7 8 9 10 11 12 13 14 15 16 17 18 19 20 21 22 23 24 25 26 27 28 29 30 31 32 33 34 35 36 37 38 39 40 41 42 43 44 45 46 47 48 49 50 51 52 53 54 55 |
public class SafetyEvaluator { public float EvaluateSafety(Unit enemy, Vector2Int position, List<Unit> playerUnits, GridMap gridMap) { float safetyScore = 0f; // 1. 最も近いプレイヤーへの距離 float minDistance = float.MaxValue; foreach (var player in playerUnits) { if (player.stats.currentHP <= 0) continue; int distance = Mathf.Abs(player.gridX - position.x) + Mathf.Abs(player.gridY - position.y); minDistance = Mathf.Min(minDistance, distance); } safetyScore += minDistance * 10f; // 2. 攻撃範囲内にいるプレイヤーの数 int attackersInRange = 0; foreach (var player in playerUnits) { if (player.stats.currentHP <= 0) continue; int distance = Mathf.Abs(player.gridX - position.x) + Mathf.Abs(player.gridY - position.y); if (distance <= player.stats.attackRange) { attackersInRange++; } } safetyScore -= attackersInRange * 50f; // 3. 受ける可能性のあるダメージ float potentialDamage = 0f; foreach (var player in playerUnits) { if (player.stats.currentHP <= 0) continue; int distance = Mathf.Abs(player.gridX - position.x) + Mathf.Abs(player.gridY - position.y); if (distance <= player.stats.attackRange) { int damage = player.stats.attack - enemy.stats.defense; potentialDamage += Mathf.Max(1, damage); } } safetyScore -= potentialDamage * 5f; return safetyScore; } } |
このコードで、安全度を評価できます。
プレイヤーからの距離、攻撃範囲内のプレイヤー数、受ける可能性のあるダメージを考慮します。
安全度評価は、敵AIが無謀な行動を避けるために重要です。ただし、安全すぎると、プレイヤーが退屈します。バランスを取りましょう。
段階的に賢くする方法

敵AIは、段階的に賢くしていきます。
実装方法を紹介します。
- 週1基本的なルールベースAI(所要10時間)
最も近いプレイヤーを探し、攻撃範囲内なら攻撃、範囲外なら移動するシンプルなAIを実装します。
- 週2スコアリングによる判断(所要10時間)
ターゲット選択と行動選択にスコアリングを導入します。距離・HP・攻撃力などを考慮します。
- 週3安全度評価の追加(所要10時間)
安全度評価を追加し、無謀な行動を避けるようにします。プレイヤーの攻撃範囲も考慮します。
合計30時間で、基本的な敵AIが完成します。
1日2時間なら、約2週間で完成します。
難易度別のAI調整
|
1 2 3 4 5 6 7 8 9 10 11 12 13 14 15 16 17 18 19 20 21 22 23 24 25 26 27 28 29 30 31 32 33 34 35 36 37 38 39 40 41 42 43 44 45 46 47 48 49 50 51 52 53 54 55 56 57 58 59 60 61 62 63 64 65 66 67 68 69 |
public enum AIDifficulty { Easy, // 簡単:ランダム行動 Normal, // 普通:基本的なルールベース Hard // 難しい:スコアリング + 安全度評価 } public class EnemyAI : MonoBehaviour { public AIDifficulty difficulty = AIDifficulty.Normal; public void ExecuteTurn() { switch (difficulty) { case AIDifficulty.Easy: ExecuteEasyAI(); break; case AIDifficulty.Normal: ExecuteNormalAI(); break; case AIDifficulty.Hard: ExecuteHardAI(); break; } } void ExecuteEasyAI() { // ランダムに行動 int random = Random.Range(0, 3); if (random == 0) { MoveRandomly(); } else if (random == 1) { AttackRandomTarget(); } else { Wait(); } } void ExecuteNormalAI() { // 基本的なルールベースAI Unit target = FindNearestPlayerUnit(); if (IsInAttackRange(target)) { Attack(target); } else { MoveTowards(target); } } void ExecuteHardAI() { // スコアリング + 安全度評価 ActionScorer scorer = new ActionScorer(); ActionCandidate bestAction = scorer.SelectBestAction(enemyUnit, playerUnits, gridMap); ExecuteAction(bestAction); } } |
難易度別にAIを調整できます。
プレイヤーのスキルに応じて、難易度を選択できます。
実装例:完全な敵AIシステム

実際に使える、完全な敵AIシステムの実装例を紹介します。
|
1 2 3 4 5 6 7 8 9 10 11 12 13 14 15 16 17 18 19 20 21 22 23 24 25 26 27 28 29 30 31 32 33 34 35 36 37 38 39 40 41 42 43 44 45 46 47 48 49 50 51 52 53 54 55 56 57 58 59 60 61 62 63 64 65 66 67 68 69 70 71 72 73 74 75 76 77 78 79 |
using UnityEngine; using System.Collections.Generic; using System.Linq; public class CompleteEnemyAI : MonoBehaviour { private Unit enemyUnit; private GridMap gridMap; private List<Unit> playerUnits; private TargetSelector targetSelector; private ActionScorer actionScorer; private SafetyEvaluator safetyEvaluator; void Start() { enemyUnit = GetComponent<Unit>(); gridMap = FindObjectOfType<GridMap>(); playerUnits = FindPlayerUnits(); targetSelector = new TargetSelector(); actionScorer = new ActionScorer(); safetyEvaluator = new SafetyEvaluator(); } public void ExecuteTurn() { // 1. 最適なターゲットを選択 Unit target = targetSelector.SelectBestTarget(enemyUnit, playerUnits, gridMap); if (target == null) return; // 2. 行動候補を生成してスコアリング ActionCandidate bestAction = actionScorer.SelectBestAction(enemyUnit, playerUnits, gridMap); // 3. 安全度を考慮して最終決定 if (bestAction.actionType == ActionType.Move) { float safety = safetyEvaluator.EvaluateSafety(enemyUnit, bestAction.targetPosition, playerUnits, gridMap); // 安全度が低すぎる場合は、より安全な位置を探す if (safety < -50f) { bestAction = FindSaferPosition(); } } // 4. 行動を実行 ExecuteAction(bestAction); } void ExecuteAction(ActionCandidate action) { switch (action.actionType) { case ActionType.Move: enemyUnit.SetPosition(action.targetPosition.x, action.targetPosition.y, gridMap); break; case ActionType.Attack: FindObjectOfType<BattleSystem>().ExecuteAttack(enemyUnit, action.targetUnit); break; case ActionType.Wait: // 待機 break; } } ActionCandidate FindSaferPosition() { // より安全な位置を探す // 実装は省略 return new ActionCandidate { actionType = ActionType.Wait }; } List<Unit> FindPlayerUnits() { // プレイヤーユニットを取得 return new List<Unit>(); } } |
このコードで、完全な敵AIシステムが実装できます。
ターゲット選択、行動スコアリング、安全度評価を統合しています。
よくある質問(FAQ)

シミュレーションゲームを作りたいなら!Unity入門の森のシミュレーション制作講座で本格ゲーム開発に挑戦しよう
Unity入門の森には、経営・農場・SRPGなど幅広いシミュレーションゲームを作れる講座が揃っています。作りたいジャンルや目標スキルに合わせて選んでみてください。
経営シミュレーション×農場ゲームの作り方講座【Unity6対応!AIエージェント実装まで学べる唯一の講座!】
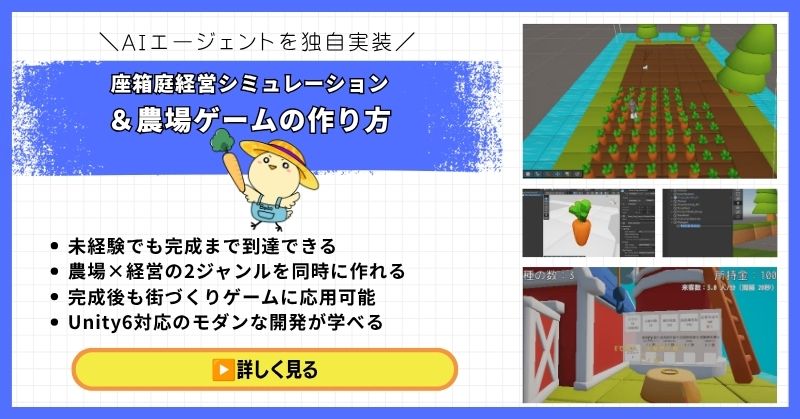
- 未経験でも完成まで到達できる丁寧な解説
- 農場×経営の2ジャンルを同時に作れる
- 賢く自律行動するAIエージェントを独自実装できる
- 完成後も街づくりゲームに応用可能な高い拡張性
- Unity6対応のモダンな開発手法が身につく
経営シミュレーション×農場ゲームの作り方講座は、シムシティ・牧場物語・どうぶつの森のようなゲームを自分で作れるようになる講座です。
農作物の育成・収穫・販売システムはもちろん、NavMeshを使ったお客さんAIの来店・購入・帰宅の自律行動や、ルールベースAIによる従業員エージェントの実装まで、本格的なゲームAI開発が学べます。
箱庭経営シミュレーションという複合的な題材を通して、Unity中級者・上級者に必要な幅広い開発スキルを一気に習得できる講座です。
Unity6対応・AIエージェント実装まで学べる
農場も経営もコレ1本で完成させよう
→ 経営シミュレーション×農場ゲーム講座を見てみる
応用・拡張性は無限大!自律行動するAIを実装して一歩先のゲーム開発へ!
UnityシミュレーションRPGの作り方講座(SRPG)【全16回!本格タクティクスSRPGをゼロから作れる!】
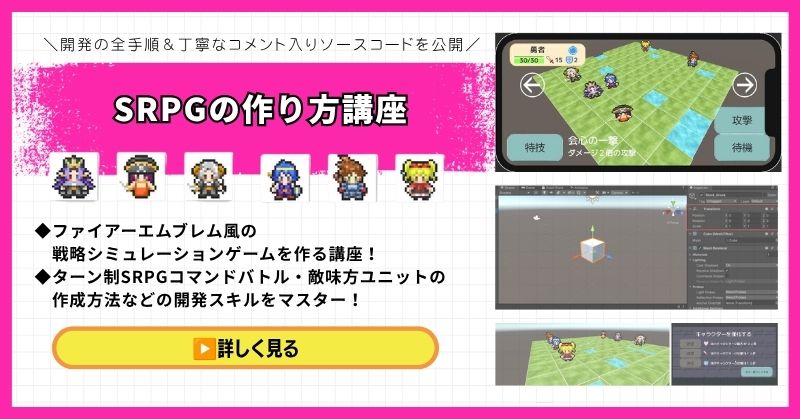
- ファイアーエムブレム風の本格タクティクスSRPGを0から開発
- 書籍でも情報が少ない戦術シミュレーションを丁寧に解説
- 難解なグリッドシステム・敵AI戦術を完全攻略できる
- 全文コメント入りソースコード付きで初心者でも理解しながら進められる
- Unity入門の森の最高傑作の一つ・解説の丁寧さはトップクラス
UnityシミュレーションRPGの作り方講座(SRPG)は、ファイアーエムブレム・タクティクスオウガ・FFタクティクスのようなターン制ストラテジーシミュレーションゲームを作るための講座です。
移動可能エリアの設定・ターン進行管理・コマンド選択型戦闘・敵AI戦術ストラテジーなど、本格SRPGに必要な機能をすべてゼロから開発します。開発難易度が高いシステムも、全文コメント入りのソースコードと丁寧な解説で確実に理解しながら進められます。
「SRPGを作れる」というスキルは希少価値が高く、Unityエンジニアとして中・上級者を目指す人に強くおすすめの一本です。
本格タクティクスSRPGをゼロから完成させる
難解なグリッドシステムと敵AIを完全攻略しよう
→ UnityシミュレーションRPG(SRPG)講座を見てみる
他では学べない当サイト最高傑作!エンジニアとして頭一つ抜ける希少スキルを今すぐ。
Unity ノンフィールドRPG+スレスパ風JRPG講座【Unity6対応!デッキ構築×JRPGをスマホ向けに作れる!】
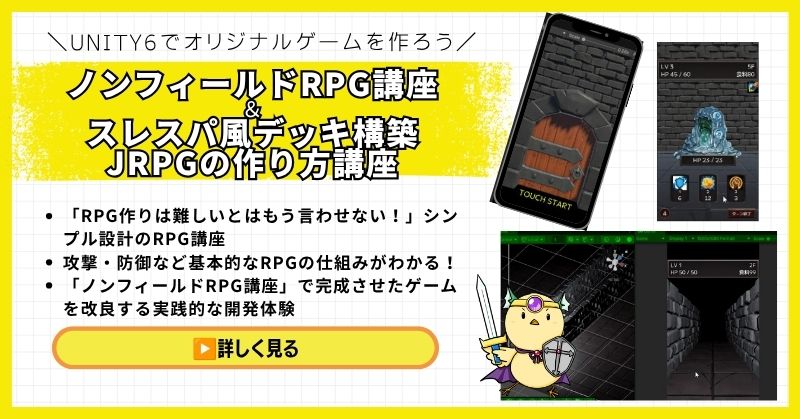
- Unity6対応・スマホ化対応で最新環境のゲーム開発が学べる
- Slay the Spire風のデッキ構築システム×JRPGの組み合わせを実装
- 初心者でも取り組みやすい丁寧な解説構成
- ノンフィールドRPGとデッキ構築JRPGの2つを合わせて学ぶのがおすすめ
Unity ノンフィールドRPGの作り方講座+Slay the Spire風デッキ構築JRPGの作り方講座は、今もっともトレンドのデッキ構築型ゲームシステムをJRPGと組み合わせて実装する方法を学べる講座です。
Unity6対応・スマホ化対応の最新カリキュラムで、デッキ構築の核となるシステムをしっかり習得できます。シミュレーション系の設計思想とも親和性が高く、ゲーム開発の幅を広げたい方にもおすすめです。
「Slay the Spireみたいなゲームを自分でも作ってみたい!」という人の最初の一歩として最適な講座です。
Unity6対応・スマホ化対応の最新カリキュラム
トレンドのデッキ構築×JRPGを最速で実装しよう
→ Slay the Spire風デッキ構築JRPG講座を見てみる
SLGの設計思想とも親和性抜群!トレンドシステムを取り入れて開発の幅を広げよう!
まとめ

敵AIは、段階的に実装すれば必ず完成します。
最初はシンプルに、後から機能を追加していきましょう。
✅ 今日から始める3ステップ
- ステップ1:基本的なルールベースAIを実装する(所要3時間)
- ステップ2:ターゲット選択にスコアリングを追加する(所要2時間)
- ステップ3:行動選択にスコアリングを追加する(所要3時間)
本格的にUnityを学びたい方は、Unity入門の森で実践的なスキルを身につけましょう。
あなたのペースで、少しずつ進めていけば大丈夫です。
あなたのオリジナルゲーム、今年こそ完成させませんか?
RPG・アクション・ホラー…Unityで本格ゲームを作りたい人のための学習サイトです。
実際に完成するゲームを題材に、
ソースコード・素材・プロジェクト一式をすべて公開。
仕事や学校の合間の1〜2時間でも、
「写経→改造」で自分のゲームまで作りきれる環境です。

コメント